
How to send emails from a custom domain
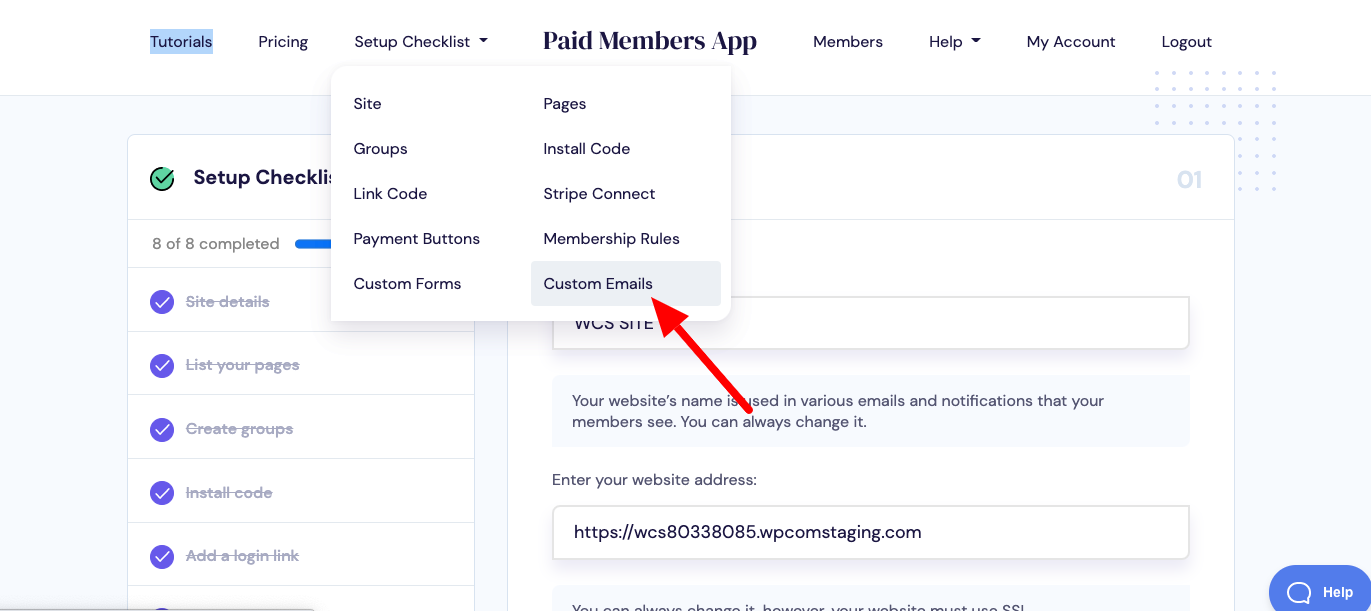
1.) Navigate to Setup Checklist > Customize Emails.
2.) Create a SendGrid.com account

3.) Login to SendGrid > Settings > Sender Authentication
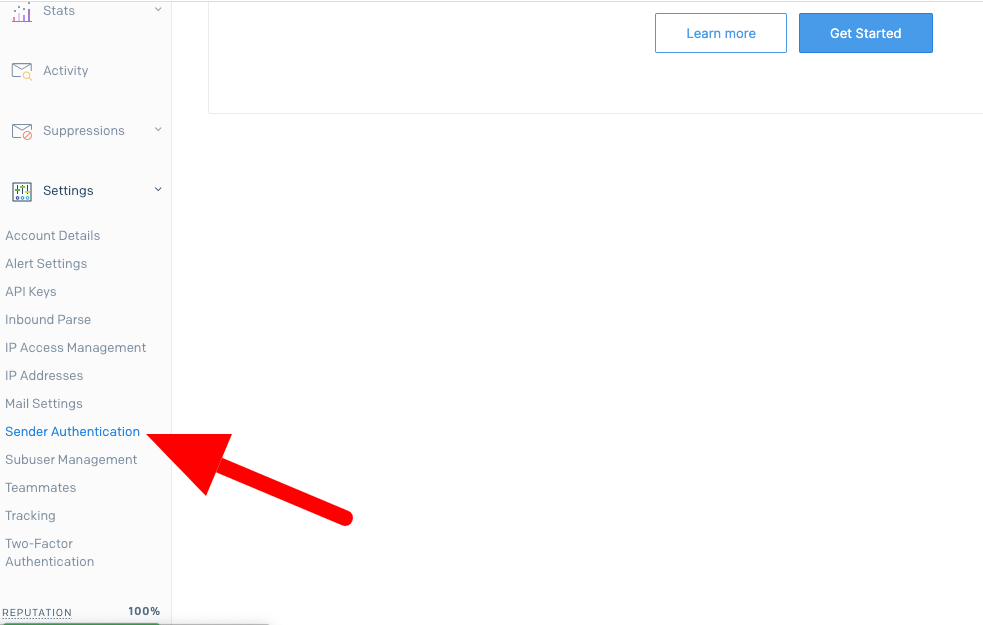
4.) Click on "Get Started" button

5.) Select your host provider from the dropdown e.g. "GoDaddy"

6.) Click on the "Yes" radio button to branch the link for the email so that example.com "via SendGrid" will not appear in the email to your member.

7.) Enter your domain name e.g. example.com

8.) Check on "Use automated security" > Click Next

9.) Copy all CNAME hosts and Points to

10.) Login to your host provider account > My Domains > Click on domain name

11.) Scroll to Additional Settings > Click "Manage DNS" link

12.) Copy Paste all CNAME entries form SendGrid > Save Note: It might take some time to reflect DNS

13.) Check the checkbox "I've added these records" > Click on Verify

14.) Check status, it should be "verified"

15.) An additional step required to send emails via your SendGrid account is to create a SendGrid API Key. To do this, click on the 'API Keys' link under Settings in your SendGrid account

16.) Click on the "Create API key" button

17.) Enter any API key name and choose API key permissions > Create

18.) Copy the API key

19.) Now, navigate to Setup Checklist > Custom Emails in Paid Members App > Paste your API key in the "SendGrid API Key" field. Enter values for the "From Company" and "From Email" fields > Save
